Book cover design. Tutorial

Book cover design
Tutorial
Tatiana Oliva Morales
Illustrator Tatiana Oliva Morales
Cover designer Tatiana Oliva Morales
© Tatiana Oliva Morales, 2020
© Tatiana Oliva Morales, illustrations, 2020
© Tatiana Oliva Morales, cover design, 2020
ISBN 978-5-4498-0268-2
Created with Ridero smart publishing system
Annotation
The tutorial consists of 2 parts. The first part sets forth a theory with detailed explanations of design principles, examples and exercises to study various techniques.
The second part, the workshop, consists of 28 designs for processing and recreating. The manual is designed to study the principles of book cover design «from scratch». Partly the attention is paid to illustration.
After completing the full course of this tutorial, you will be able to make any design you are interested in: the cover of a children’s book, a collection of poems, fiction, educational and other literature.
From the author
This tutorial can be used as a self-learning manual. If you need additional consultations or classes, you may contact me. Consultations / classes in person and via Skype are possible.
Individual orders for cover design and book illustration are accepted.
My contact details
Tel 8 925 184 37 07
Skype: oliva-morales
E-mail: oliva-morales@mail.ru
Website:
https://lronline.ru
Respectfully,Tatiana Oliva MoralesIntroduction
It so happened that I became a writer. I write different things – textbooks, prose, sometimes poetry, and, of course, books for children. And, as you know, this is a special kind of literature that requires high-quality content, including a bright and beautiful cover, as well as illustrations.
While I was writing only textbooks, I did not think about any special cover design. Sure, it was important for me. I wanted the cover to be attractive, recognizable, especially since, as a rule, I never write one single textbook, but do them in series.
So, when I realized that I had accumulated material in my computer from which I could get about a hundred educational children’s books, the issue of their covers design and illustrations came up very sharply.
I did not want to entrust both of those processes to anyone else. I perfectly understood that no one except me knew and felt the content of those books better, and therefore he would not complete the design of the covers and illustrations the way I could make.
Despite the fact that I have an art education, and I still draw when I find inspiration, I do it exclusively on canvas or an album sheet – I don’t know how to draw on a computer.
Therefore, I was faced with the task of either learning how to draw on a computer or understanding how the designers work in graphic editors.
I began to google, and after some time I googled the information about the graphic editor on the Canva website. The reviews about it were not bad, so I registered there and began to study the program. It took several days, but my work was not in vain.
After some time, I realized that working on Canva is about as easy as using a Word text editor. Very quickly I filled my hand. I began to make covers and illustrations. Although, of course, each cover was made painstakingly, since I am extremely responsible for the process of its creation, and every detail is important to me.
So on Canva it turned out that you didn’t need to be able to draw on a computer in order to create covers and illustrations, although the art education was very useful to me there.
But I can tell you exactly that you can completely do without having such an education, if you have a taste, a sense of harmony of colors and composition.
Part 1. Theory and practice of cover design and illustrations
Lesson 1. How the graphical editor works (on the example of the Canva site)
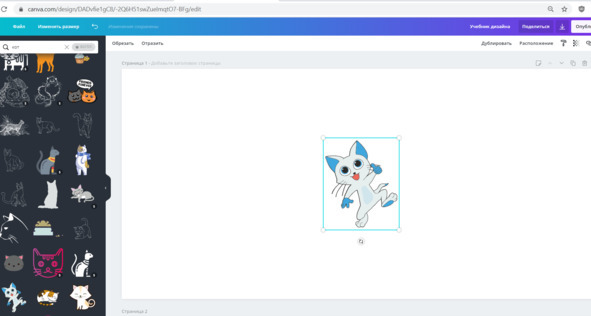
In the graphics editor you have a blank white page in front of you. You can set its size (it changes in pixels, millimeters, centimeters and inches). Here you can also select elements for composition from the Canva data bank. It looks like this.

The background color (of the same white page) can also be changed in different ways. You can use the color palette (it is at the top left), you can select a background from the Canva data bank (the window on the left, Background tab) or load your own one (the window on the left, Download tab).
You can work on Canva for free, but then the possibilities will be pretty limited, and you can pay a fee for a month (or for a longer period of time, see Tariff plans), then you will have all the tools to create interesting designs. The monthly maintenance costs about 10 US dollars.
As for the elements that you need to place on the cover – they all change in size, move and rotate, if necessary. Some of them can change color.
All this can be made with the mouse cursor – hold the object with the left mouse button and then move it wherever you want. Using the same cursor, you can change the size of the object. If a color change is available for an object, you will see a palette on the top panel when you click on this object.
The complete picture of how this graphic editor works can be obtained by watching video tutorials at this link
https://www.youtube.com/watch?v=WL-WbHwsbs8
Although personally I chose to go to the rest myself.
Therefore, I further propose to consider the basic functions of Canva by examples and exercises.
At this stage, you need to register on the Canva website https://www.canva.com/ and create an account, all this is completely free.
Lesson 2. Uploading Images and Downloading Designs
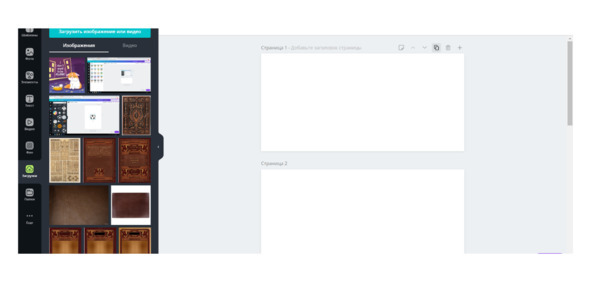
To download an image, use the Downloads tab in the left panel, see the screenshot.

In order to move any downloaded image to the background, click on it 1 time.
Exercise 1
Save this image on your computer in jpg. or png. format, upload it to Canva and move it to the background.

It should be something like this.

Exercise 2
Save and download this page.
To save the page, go to the File tab on the top panel, then click on the Save tab.
To download this page (page 1), go to the tab on which the down arrow is drawn (on the top panel on the right), click on it, select page 1 from the drop-down list, check it, click Finish, click Save.
If everything is done correctly, the download of the design will begin. When it is ready, you will see a pop-up window with the inscription Design published, see the screenshot.

You’ll find this design in Downloads on your computer.
Lesson 3. Resizing an image
The image size can be changed in the graphical editor on the Canva website. If you need to resize the background (the cover itself or the illustration), click on the top panel on the Resize tab, then on the Custom Sizes tab, set the desired values.
Exercise 3
Set the following sizes for the image below:
200 mm x 300 mm
40 cm x 60 cm
16 inch x 23 inch
12500 pixels x 1950 pixels

Almost always, when creating the next design on the Canva website, you have to adjust the sizes of its various parts – change their size, location, and sometimes change tone or color.
Конец ознакомительного фрагмента.
Текст предоставлен ООО «ЛитРес».
Прочитайте эту книгу целиком, купив полную легальную версию на ЛитРес.
Безопасно оплатить книгу можно банковской картой Visa, MasterCard, Maestro, со счета мобильного телефона, с платежного терминала, в салоне МТС или Связной, через PayPal, WebMoney, Яндекс.Деньги, QIWI Кошелек, бонусными картами или другим удобным Вам способом.
Вы ознакомились с фрагментом книги.
Для бесплатного чтения открыта только часть текста.
Приобретайте полный текст книги у нашего партнера:
Всего 10 форматов